
Port Forwarding
When developing within a Kloud Workspace (container), ports exposed by the running instance are not accessible externally by default, due to Docker's network isolation settings, which are implemented for security reasons.
To enable external connections, specific network configurations or port forwarding must be set up.
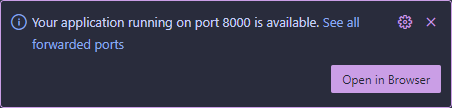
Ports published within Kloud Workspace are automatically detected and accessible through an internal proxy. A notification will appear in the bottom-right corner of the workspace, providing quick access to the published service.
The following sections outline the available methods for enabling access to services running inside the Kloud Workspace instance.
Access Methods
Subpath Access (enabled by default)
All published ports in Kloud Workspace are accessible through a subpath format as /proxy/<port>/.
For example, if your Kloud Workspace is deployed at 127.0.0.1 and you run the pyserver command in the terminal (which deploys a file index server on port 8000), you can access the server at 127.0.0.1/proxy/8000.
Subdomain Access
⚠️ WARNING
When using a reverse proxy, ensure that it is correctly configured to forward the host header. This is crucial for the service access configuration to function properly.
For subdomain access, you must configure a DNS entry for each port you want to access. Alternatively, you can set up a wildcard DNS entry (*.<domain>) to automatically manage proxying across all ports.
ℹ️ INFO
If adding DNS entries is not possible, refer to the documentation below for a workaround you can implement on local systems.
You can define the domain (and subdomain) structure using the WS_SERVER_PROXY_DOMAIN environment variable:
sh
docker run \
  -e WS_SERVER_PROXY_DOMAIN=ws.dev \
  ghcr.io/kloudkit/workspace:v0.3.0
In the configuration above, if your Kloud Workspace is hosted at ws.dev and you run the pyserver command (which launches a file index server on port 8000), you can access the server at 8000.ws.dev.
Multiple domains (since v0.0.22)
You can provide multiple proxy domains by passing a space-delimited list:
sh
docker run \
  -e WS_SERVER_PROXY_DOMAIN="ws.dev local.ws.dev" \
  ghcr.io/kloudkit/workspace:v0.3.0
With the configuration above, services will be available on both domains: *.ws.dev and *.local.ws.dev.
Local DNS
If you're unable to modify a DNS server, you can manually define hostname-to-IP mappings on your local machine using the /etc/hosts for Linux or C:\Windows\System32\drivers\etc\hosts on Windows. This method is useful for testing or development environments.
⚠️ WARNING
This configuration only affects your local machine and does not impact external DNS servers.
Avoid using this method in production environments.
To map a domain name to your local machine (IP: 127.0.0.1):
Open
/etc/hostsfor editing.Add a new entry at the end of the file. For example, for subdomain access to port
8000:plaintext127.0.0.1 8000.ws.testIf you use multiple domains, add one line per domain:
plaintext127.0.0.1 8000.ws.test 127.0.0.1 8000.local.ws.testVerify the configuration by running
ping 8000.ws.testin the terminal. The output should show the IP127.0.0.1.
💡 TIP
Avoid using TLDs like .dev or .new as they require an SSL certificate.
A few important notes when using this workaround:
/etc/hostsdoes not support wildcard records (i.e.,*.ws.test). You must manually repeat the process for each port you intend to expose.- This method will only work if Kloud Workspace is published on port
80or443.